安装etcd集群(含CA)

前言

etcd 是一个开源的分布式键值存储,用于分布式系统最关键的数据。
它通过将数据复制到多台机器来分布,因此对于单点故障具有很高的可用性。
使用 Raft 共识算法,etcd 优雅地处理网络分区和机器故障,甚至是领导者故障。
etcd 被广泛应用于生产环境:CoreOS、Kubernetes、YouTube Doorman 等。

我这里有

  • 192.168.2.158 etcd-158
  • 192.168.2.159 etcd-159
  • 192.168.2.160 etcd-160

etcd 集群指南

CA

生成CA

配置时间

1
2
yum install  ntpdate -y 
ntpdate time1.aliyun.com

etcd GitHub地址

1
2
3
4
5
6
7
8
9
10
11
12
13
14
15
16
17
18
19
20
21
22
rm -f ~/etcd-v3.5.4-linux-amd64.tar.gz
rm -rf /opt/etcd && mkdir -p /opt/etcd
curl -L https://github.com/etcd-io/etcd/releases/download/v3.5.4/etcd-v3.5.4-linux-amd64.tar.gz -o ~/etcd-v3.5.4-linux-amd64.tar.gz
tar xzvf ~/etcd-v3.5.4-linux-amd64.tar.gz -C /opt/etcd --strip-components=1
# rm -f ~/etcd-v3.5.4-linux-amd64.tar.gz
/opt/etcd/etcd --version
/opt/etcd/etcdctl version
/opt/etcd/etcdutl version
# 将 etcd 二进制文件传到 3个master 节点
scp /opt/etcd/etcd root@192.168.2.158:/usr/local/bin/
scp /usr/local/bin/etcd root@192.168.2.159:/usr/local/bin/
scp /usr/local/bin/etcd root@192.168.2.160:/usr/local/bin/
scp /usr/local/bin/etcd root@192.168.2.161:/usr/local/bin/
scp /opt/etcd/etcdctl root@192.168.2.158:/usr/local/bin/
scp /usr/local/bin/etcdctl root@192.168.2.159:/usr/local/bin/
scp /usr/local/bin/etcdctl root@192.168.2.160:/usr/local/bin/
scp /usr/local/bin/etcdctl root@192.168.2.161:/usr/local/bin/
# start a local etcd server
#/opt/etcd/etcd
# write,read to etcd
#/opt/etcd/etcdctl --endpoints=localhost:2379 put foo bar
#/opt/etcd/etcdctl --endpoints=localhost:2379 get foo

etcd example 配置页面

cfssl 生成自签名 TLS 证书的方法

host158上执行

生成自签名 root CA 证书

1
2
3
4
5
6
7
8
9
10
11
12
13
#rm -f /opt/cfssl* 
rm -rf /opt/certs
mkdir -p /opt/certs
cd /opt/certs
curl -L https://github.com/cloudflare/cfssl/releases/download/v1.6.1/cfssl_1.6.1_linux_amd64 -o /usr/local/bin/cfssl
chmod +x /usr/local/bin/cfssl
curl -L https://github.com/cloudflare/cfssl/releases/download/v1.6.1/cfssljson_1.6.1_linux_amd64 -o /usr/local/bin/cfssljson
chmod +x /usr/local/bin/cfssljson
curl -L https://github.com/cloudflare/cfssl/releases/download/v1.5.0/cfssl-certinfo_1.5.0_linux_amd64 -o /usr/local/bin/cfssl-certinfo
chmod +x /usr/local/bin/cfssl-certinfo
# 查看版本
/usr/local/bin/cfssl version
/usr/local/bin/cfssljson -h

生成

1
2
3
4
5
6
7
8
9
10
11
12
13
14
15
16
17
18
19
20
21
22
23
24
25
26
27
28
29
30
31
32
33
34
35
36
37
38
39
40
41
42
43
44
45
46
47
48
49
50
51
52
53
54
55
56
57
58
59
60
61
62
63
# 创建根证书签名请求文件
cat > /opt/certs/ca-csr.json <<EOF
{
"key": {
"algo": "rsa",
"size": 2048
},
"names": [
{
"O": "maxzhao-ca",
"OU": "etcd Security",
"L": "NanJing",
"ST": "Jiang Su",
"C": "CN"
}
],
"CN": "maxzhao"
}
EOF
# CN:Common Name:kube-apiserver 从证书中提取该字段作为请求的用户名 (User Name),
# O:Organization:kube-apiserver 从证书中提取该字段作为请求用户所属的组 (Group);
# kube-apiserver 将提取的 User、Group 作为 RBAC 授权的用户标识;

# 证书配置文件
cat > /opt/certs/ca-config.json <<EOF
{
"signing": {
"default": {
"usages": [
"signing",
"key encipherment",
"server auth",
"client auth"
],
"expiry": "175200h"
},
"profiles": {
"kubernetes": {
"usages": [
"signing",
"key encipherment",
"server auth",
"client auth"
],
"expiry": "175200h"
},
"etcd": {
"usages": [
"signing",
"key encipherment",
"server auth",
"client auth"
],
"expiry": "175200h"
}
}
}
}
EOF
# signing:表示该证书可用于签名其它证书(生成的 ca.pem 证书中 CA=TRUE);
# server auth:表示 client 可以用该该证书对 server 提供的证书进行验证;
# client auth:表示 server 可以用该该证书对 client 提供的证书进行验证;
# "expiry": "175200h" 有效期20年

生成ca 证书和私钥

1
2
3
4
5
# 生成
cfssl gencert --initca /opt/certs/ca-csr.json | cfssljson --bare /opt/certs/ca

# verify
openssl x509 -in /opt/certs/ca.pem -text -noout

结果

1
2
3
4
5
6
7
8
9
10
# CSR configuration
/opt/certs/ca-csr.json
# CSR 双向认证
/opt/certs/ca.csr
# self-signed root CA public key 其它文档里会叫 ca.crt
/opt/certs/ca.pem
# self-signed root CA private key
/opt/certs/ca-key.pem
# 证书配置文件 for other TLS assets
/opt/certs/ca-config.json

使用私钥生成本地颁发的证书

1
2
3
4
5
6
7
8
9
10
11
12
13
14
15
16
17
18
19
20
21
22
23
24
25
26
27
28
29
30
31
32
33
34
35
36
37
38
39
40
41
# peer 
cat > /opt/certs/etcd-158-ca-csr.json <<EOF
{
"key": {
"algo": "rsa",
"size": 2048
},
"names": [
{
"O": "maxzhao-ca",
"OU": "etcd Security",
"L": "NanJing",
"ST": "Jiang Su",
"C": "CN"
}
],
"CN": "etcd-158",
"hosts": [
"127.0.0.1",
"192.168.2.158",
"192.168.2.159",
"192.168.2.160",
"192.168.2.161",
"kubernetes",
"kubernetes.default",
"kubernetes.default.svc",
"kubernetes.default.svc.cluster",
"kubernetes.default.svc.cluster.local"
]
}
EOF
# 生成etcd用的证书文件 peer
cfssl gencert \
--ca /opt/certs/ca.pem \
--ca-key /opt/certs/ca-key.pem \
--config /opt/certs/ca-config.json \
-profile=etcd \
/opt/certs/etcd-158-ca-csr.json | cfssljson --bare /opt/certs/etcd-158
# --profile=k8s-server-client 表示客户端与服务端要双向通讯
# verify
openssl x509 -in /opt/certs/etcd-158.pem -text -noout

生成之后

1
2
3
4
5
6
7
8
9
10
11
12
13
# 传输到每一个节点
rm -rf /etc/certs/etcd
mkdir -p /etc/certs/etcd
\cp /opt/certs/ca.pem /etc/certs/etcd/ca.pem
\cp /opt/certs/etcd-158-key.pem /etc/certs/etcd/etcd-158-key.pem
\cp /opt/certs/etcd-158.pem /etc/certs/etcd/etcd-158.pem
# 拷贝 ca.pem, etcd-158.pem, etcd-158-key.pem
ssh root@192.168.2.159 "mkdir -p /etc/certs/etcd"
ssh root@192.168.2.160 "mkdir -p /etc/certs/etcd"
ssh root@192.168.2.161 "mkdir -p /etc/certs/etcd"
scp -r /etc/certs/etcd/* root@192.168.2.159:/etc/certs/etcd/
scp -r /etc/certs/etcd/* root@192.168.2.160:/etc/certs/etcd/
scp -r /etc/certs/etcd/* root@192.168.2.161:/etc/certs/etcd/

创建用户和组

host158上执行

1
2
3
groupadd etcd && useradd -g etcd etcd && echo '1' | passwd --stdin etcd
ssh root@192.168.2.159 "groupadd etcd && useradd -g etcd etcd && echo '1' | passwd --stdin etcd"
ssh root@192.168.2.160 "groupadd etcd && useradd -g etcd etcd && echo '1' | passwd --stdin etcd"

运行

host158

1
2
3
4
5
6
7
8
9
10
11
12
13
14
15
16
17
18
19
20
21
22
23
24
rm -rf /opt/etcd/etcd-158
mkdir /opt/etcd/etcd-158
/usr/local/bin/etcd --name etcd-158 \
--data-dir /opt/etcd/etcd_data-158 \
# 对外提供服务的地址,通常为本机节点。使用域名无效
--listen-client-urls https://192.168.2.158:2379 \
# 节点成员客户端url列表,对外公告此节点客户端监听地址,可以使用域名
--advertise-client-urls https://192.168.2.158:2379 \
# 和其它成员节点间通信地址,每个节点不同,必须使用IP,使用域名无效
--listen-peer-urls https://192.168.2.158:2380 \
# 节点监听地址,并会通告集群其它节点
--initial-advertise-peer-urls https://192.168.2.158:2380 \
# 集群中所有节点信息,格式为:节点名称+监听的本地端口
--initial-cluster etcd-158=https://192.168.2.158:2380,etcd-159=https://192.168.2.159:2380,etcd-160=https://192.168.2.160:2380 \
--initial-cluster-token etcd-k8s-158 \
--initial-cluster-state new \
--client-cert-auth \
--trusted-ca-file /etc/certs/etcd/ca.pem \
--cert-file /etc/certs/etcd/etcd-158.pem \
--key-file /etc/certs/etcd/etcd-158-key.pem \
--peer-client-cert-auth \
--peer-trusted-ca-file /etc/certs/etcd/ca.pem \
--peer-cert-file /etc/certs/etcd/etcd-158.pem \
--peer-key-file /etc/certs/etcd/etcd-158-key.pem

host159

1
2
3
4
5
6
7
8
9
10
11
12
13
14
15
16
17
18
19
rm -rf /opt/etcd/etcd-159
mkdir /opt/etcd/etcd-159
/opt/etcd/etcd --name etcd-159 \
--data-dir /opt/etcd/etcd_data-159 \
--listen-client-urls https://192.168.2.159:2379 \
--advertise-client-urls https://192.168.2.159:2379 \
--listen-peer-urls https://192.168.2.159:2380 \
--initial-advertise-peer-urls https://192.168.2.159:2380 \
--initial-cluster etcd-158=https://192.168.2.158:2380,etcd-159=https://192.168.2.159:2380,etcd-160=https://192.168.2.160:2380 \
--initial-cluster-token etcd-k8s-158 \
--initial-cluster-state new \
--client-cert-auth \
--trusted-ca-file /etc/certs/etcd/ca.pem \
--cert-file /etc/certs/etcd/etcd-158.pem \
--key-file /etc/certs/etcd/etcd-158-key.pem \
--peer-client-cert-auth \
--peer-trusted-ca-file /etc/certs/etcd/ca.pem \
--peer-cert-file /etc/certs/etcd/etcd-158.pem \
--peer-key-file /etc/certs/etcd/etcd-158-key.pem

host160

1
2
3
4
5
6
7
8
9
10
11
12
13
14
15
16
17
18
19
rm -rf /opt/etcd/etcd-160
mkdir /opt/etcd/etcd-160
/opt/etcd/etcd --name etcd-160 \
--data-dir /opt/etcd/etcd_data-160 \
--listen-client-urls https://192.168.2.160:2379 \
--advertise-client-urls https://192.168.2.160:2379 \
--listen-peer-urls https://192.168.2.160:2380 \
--initial-advertise-peer-urls https://192.168.2.160:2380 \
--initial-cluster etcd-158=https://192.168.2.158:2380,etcd-159=https://192.168.2.159:2380,etcd-160=https://192.168.2.160:2380 \
--initial-cluster-token etcd-k8s-158 \
--initial-cluster-state new \
--client-cert-auth \
--trusted-ca-file /etc/certs/etcd/ca.pem \
--cert-file /etc/certs/etcd/etcd-158.pem \
--key-file /etc/certs/etcd/etcd-158-key.pem \
--peer-client-cert-auth \
--peer-trusted-ca-file /etc/certs/etcd/ca.pem \
--peer-cert-file /etc/certs/etcd/etcd-158.pem \
--peer-key-file /etc/certs/etcd/etcd-158-key.pem

校验运行状态

1
2
3
4
5
6
ETCDCTL_API=3 /opt/etcd/etcdctl \
--endpoints 192.168.2.158:2379,192.168.2.159:2379,192.168.2.160:2379 \
--cacert /etc/certs/etcd/ca.pem \
--cert /etc/certs/etcd/etcd-158.pem \
--key /etc/certs/etcd/etcd-158-key.pem \
endpoint health

配置服务

注意:三个节点配置结束后,服务才会启动成功

host158

1
2
3
4
5
6
7
8
9
10
11
12
13
14
15
16
17
18
19
20
21
22
23
24
25
26
27
28
29
30
31
32
33
34
35
36
37
38
39
40
41
42
43
rm -rf /opt/etcd/etcd
mkdir /opt/etcd/etcd
cat > /etc/systemd/system/etcd.service <<EOF
[Unit]
Description=etcd
Documentation=https://github.com/coreos/etcd
Conflicts=etcd.service
Conflicts=etcd2.service

[Service]
Type=notify
Restart=always
RestartSec=5s
LimitNOFILE=40000
TimeoutStartSec=0

ExecStart=/usr/local/bin/etcd --name etcd-158 \
--data-dir /opt/etcd/etcd_data \
--listen-client-urls https://192.168.2.158:2379 \
--advertise-client-urls https://192.168.2.158:2379 \
--listen-peer-urls https://192.168.2.158:2380 \
--initial-advertise-peer-urls https://192.168.2.158:2380 \
--initial-cluster etcd-158=https://192.168.2.158:2380,etcd-159=https://192.168.2.159:2380,etcd-160=https://192.168.2.160:2380 \
--initial-cluster-token etcd-k8s-158 \
--initial-cluster-state new \
--client-cert-auth \
--trusted-ca-file /etc/certs/etcd/ca.pem \
--cert-file /etc/certs/etcd/etcd-158.pem \
--key-file /etc/certs/etcd/etcd-158-key.pem \
--peer-client-cert-auth \
--peer-trusted-ca-file /etc/certs/etcd/ca.pem \
--peer-cert-file /etc/certs/etcd/etcd-158.pem \
--peer-key-file /etc/certs/etcd/etcd-158-key.pem

[Install]
WantedBy=multi-user.target
EOF
# to start service
sudo systemctl daemon-reload
#sudo systemctl cat etcd.service
sudo systemctl enable etcd.service
sudo systemctl start etcd.service
sudo systemctl status etcd.service

host159

1
2
3
4
5
6
7
8
9
10
11
12
13
14
15
16
17
18
19
20
21
22
23
24
25
26
27
28
29
30
31
32
33
34
35
36
37
38
39
40
41
42
43
rm -rf /opt/etcd/etcd
mkdir /opt/etcd/etcd
cat > /etc/systemd/system/etcd.service <<EOF
[Unit]
Description=etcd
Documentation=https://github.com/coreos/etcd
Conflicts=etcd.service
Conflicts=etcd2.service

[Service]
Type=notify
Restart=always
RestartSec=5s
LimitNOFILE=40000
TimeoutStartSec=0

ExecStart=/usr/local/bin/etcd --name etcd-159 \
--data-dir /opt/etcd/etcd_data \
--listen-client-urls https://192.168.2.159:2379 \
--advertise-client-urls https://192.168.2.159:2379 \
--listen-peer-urls https://192.168.2.159:2380 \
--initial-advertise-peer-urls https://192.168.2.159:2380 \
--initial-cluster etcd-158=https://192.168.2.158:2380,etcd-159=https://192.168.2.159:2380,etcd-160=https://192.168.2.160:2380 \
--initial-cluster-token etcd-k8s-158 \
--initial-cluster-state new \
--client-cert-auth \
--trusted-ca-file /etc/certs/etcd/ca.pem \
--cert-file /etc/certs/etcd/etcd-158.pem \
--key-file /etc/certs/etcd/etcd-158-key.pem \
--peer-client-cert-auth \
--peer-trusted-ca-file /etc/certs/etcd/ca.pem \
--peer-cert-file /etc/certs/etcd/etcd-158.pem \
--peer-key-file /etc/certs/etcd/etcd-158-key.pem

[Install]
WantedBy=multi-user.target
EOF
# to start service
sudo systemctl daemon-reload
#sudo systemctl cat etcd.service
sudo systemctl enable etcd.service
sudo systemctl start etcd.service
sudo systemctl status etcd.service

host160

1
2
3
4
5
6
7
8
9
10
11
12
13
14
15
16
17
18
19
20
21
22
23
24
25
26
27
28
29
30
31
32
33
34
35
36
37
38
39
40
41
42
43
rm -rf /opt/etcd/etcd
mkdir /opt/etcd/etcd
cat > /etc/systemd/system/etcd.service <<EOF
[Unit]
Description=etcd
Documentation=https://github.com/coreos/etcd
Conflicts=etcd.service
Conflicts=etcd2.service

[Service]
Type=notify
Restart=always
RestartSec=5s
LimitNOFILE=40000
TimeoutStartSec=0

ExecStart=/usr/local/bin/etcd --name etcd-160 \
--data-dir /opt/etcd/etcd_data \
--listen-client-urls https://192.168.2.160:2379 \
--advertise-client-urls https://192.168.2.160:2379 \
--listen-peer-urls https://192.168.2.160:2380 \
--initial-advertise-peer-urls https://192.168.2.160:2380 \
--initial-cluster etcd-158=https://192.168.2.158:2380,etcd-159=https://192.168.2.159:2380,etcd-160=https://192.168.2.160:2380 \
--initial-cluster-token etcd-k8s-158 \
--initial-cluster-state new \
--client-cert-auth \
--trusted-ca-file /etc/certs/etcd/ca.pem \
--cert-file /etc/certs/etcd/etcd-158.pem \
--key-file /etc/certs/etcd/etcd-158-key.pem \
--peer-client-cert-auth \
--peer-trusted-ca-file /etc/certs/etcd/ca.pem \
--peer-cert-file /etc/certs/etcd/etcd-158.pem \
--peer-key-file /etc/certs/etcd/etcd-158-key.pem

[Install]
WantedBy=multi-user.target
EOF
# to start service
sudo systemctl daemon-reload
#sudo systemctl cat etcd.service
sudo systemctl enable etcd.service
sudo systemctl start etcd.service
sudo systemctl status etcd.service

校验运行状态

1
2
3
4
5
6
7
8
9
10
11
12
13
14
15
# to get logs from service
sudo systemctl status etcd.service -l --no-pager
sudo journalctl -u etcd.service -l --no-pager|less
sudo journalctl -f -u etcd.service
sudo journalctl -xe -u etcd.service
# to stop service
sudo systemctl stop etcd.service
sudo systemctl disable etcd.service

ETCDCTL_API=3 /opt/etcd/etcdctl \
--endpoints 192.168.2.158:2379,192.168.2.159:2379,192.168.2.160:2379 \
--cacert /etc/certs/etcd/ca.pem \
--cert /etc/certs/etcd/etcd-158.pem \
--key /etc/certs/etcd/etcd-158-key.pem \
endpoint health

image-20220529234008606

查看成员

1
2
3
4
ENDPOINTS=192.168.2.158:2379,192.168.2.159:2379,192.168.2.160:2379
ETCD_AUTH='--cacert /etc/certs/etcd/ca.pem --cert /etc/certs/etcd/etcd-158.pem --key /etc/certs/etcd/etcd-158-key.pem '
etcdctl --endpoints=${ENDPOINTS} member list
etcdctl --endpoints=${ENDPOINTS} ${ETCD_AUTH} member list

创建用户

1
2
3
4
5
6
7
8
9
10
11
12
13
14
15
16
17
18
19
20
21
22
23
24
25
26
export ETCDCTL_API=3
ENDPOINTS=192.168.2.158:2379,192.168.2.159:2379,192.168.2.160:2379
ETCD_AUTH='--cacert /etc/certs/etcd/ca.pem --cert /etc/certs/etcd/etcd-158.pem --key /etc/certs/etcd/etcd-158-key.pem '
etcdctl --endpoints=${ENDPOINTS} ${ETCD_AUTH} role add root
etcdctl --endpoints=${ENDPOINTS} ${ETCD_AUTH} role get root
etcdctl --endpoints=${ENDPOINTS} ${ETCD_AUTH} user add root
etcdctl --endpoints=${ENDPOINTS} ${ETCD_AUTH} user grant-role root root
etcdctl --endpoints=${ENDPOINTS} ${ETCD_AUTH} user get root
etcdctl --endpoints=${ENDPOINTS} ${ETCD_AUTH} auth enable
# 错误的
etcdctl --endpoints=${ENDPOINTS} ${ETCD_AUTH} user list
# 正确的
etcdctl --endpoints=${ENDPOINTS} ${ETCD_AUTH} --user=root:1 user list

# now all client requests go through auth
etcdctl --endpoints=${ENDPOINTS} ${ETCD_AUTH} --user=root:1 put foo bar
etcdctl --endpoints=${ENDPOINTS} ${ETCD_AUTH} --user=root:1 get foo
etcdctl --endpoints=${ENDPOINTS} ${ETCD_AUTH} --user=root:1 --write-out="json" get foo
etcdctl --endpoints=${ENDPOINTS} ${ETCD_AUTH} --user=root:1 put foo1 bar
etcdctl --endpoints=${ENDPOINTS} ${ETCD_AUTH} --user=root:1 put foo2 bar
etcdctl --endpoints=${ENDPOINTS} ${ETCD_AUTH} --user=root:1 get fo --prefix
etcdctl --endpoints=${ENDPOINTS} ${ETCD_AUTH} --user=root:1 del foo1 --prefix
etcdctl --endpoints=${ENDPOINTS} ${ETCD_AUTH} --user=root:1 get foo
etcdctl --endpoints=${ENDPOINTS} ${ETCD_AUTH} --user=root:1 get foo1
# 关闭
etcdctl --endpoints=${ENDPOINTS} ${ETCD_AUTH} --user=root:1 auth disable

访问

注意:需要添加

1
2
3
4
5
6
export ETCDCTL_API=3
ENDPOINTS=192.168.2.158:2379,192.168.2.159:2379,192.168.2.160:2379
--endpoints ${ENDPOINTS} ${ETCD_AUTH}
--cacert /etc/certs/etcd/ca.pem \
--cert /etc/certs/etcd/etcd-158.pem \
--key /etc/certs/etcd/etcd-158-key.pem \

添加 key-value

1
2
3
4
5
6
export ETCDCTL_API=3
ENDPOINTS=192.168.2.158:2379,192.168.2.159:2379,192.168.2.160:2379

etcdctl --endpoints=${ENDPOINTS} ${ETCD_AUTH} put foo "Hello World!"
etcdctl --endpoints=${ENDPOINTS} ${ETCD_AUTH} get foo
etcdctl --endpoints=${ENDPOINTS} ${ETCD_AUTH} --write-out="json" get foo

通过前缀获取密钥

1
2
3
4
5
etcdctl --endpoints=${ENDPOINTS} ${ETCD_AUTH} put web1 value1
etcdctl --endpoints=${ENDPOINTS} ${ETCD_AUTH} put web2 value2
etcdctl --endpoints=${ENDPOINTS} ${ETCD_AUTH} put web3 value3

etcdctl --endpoints=${ENDPOINTS} ${ETCD_AUTH} get web --prefix

事务中多次写入

1
2
3
4
5
6
7
8
9
10
11
etcdctl --endpoints=${ENDPOINTS} ${ETCD_AUTH} put user1 bad
etcdctl --endpoints=${ENDPOINTS} ${ETCD_AUTH} txn --interactive

compares:
value("user1") = "bad"

success requests (get, put, delete):
del user1

failure requests (get, put, delete):
put user1 good

查看 keys

1
2
3
4
5
6
etcdctl --endpoints=${ENDPOINTS} ${ETCD_AUTH} watch stock1
etcdctl --endpoints=${ENDPOINTS} ${ETCD_AUTH} put stock1 1000

etcdctl --endpoints=${ENDPOINTS} ${ETCD_AUTH} watch stock --prefix
etcdctl --endpoints=${ENDPOINTS} ${ETCD_AUTH} put stock1 10
etcdctl --endpoints=${ENDPOINTS} ${ETCD_AUTH} put stock2 20

创建 lease

1
2
3
4
5
6
7
8
9
10
etcdctl --endpoints=${ENDPOINTS} ${ETCD_AUTH} lease grant 300
# lease 2be7547fbc6a5afa granted with TTL(300s)

etcdctl --endpoints=${ENDPOINTS} ${ETCD_AUTH} put sample value --lease=2be7547fbc6a5afa
etcdctl --endpoints=${ENDPOINTS} ${ETCD_AUTH} get sample

etcdctl --endpoints=${ENDPOINTS} ${ETCD_AUTH} lease keep-alive 2be7547fbc6a5afa
etcdctl --endpoints=${ENDPOINTS} ${ETCD_AUTH} lease revoke 2be7547fbc6a5afa
# or after 300 seconds
etcdctl --endpoints=${ENDPOINTS} ${ETCD_AUTH} get sample

创建 locks

1
2
3
4
etcdctl --endpoints=${ENDPOINTS} ${ETCD_AUTH} lock mutex1

# another client with the same name blocks
etcdctl --endpoints=${ENDPOINTS} ${ETCD_AUTH} lock mutex1

etcd集群中如何进行leader选举

1
2
3
4
etcdctl --endpoints=${ENDPOINTS} ${ETCD_AUTH} elect one p1
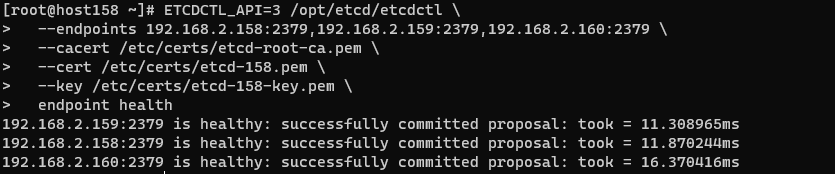
# another client with the same name blocks
etcdctl --endpoints=${ENDPOINTS} ${ETCD_AUTH} elect one p2

校验运行状态

1
2
etcdctl --endpoints=${ENDPOINTS} ${ETCD_AUTH} endpoint health
etcdctl --write-out=table --endpoints=${ENDPOINTS} ${ETCD_AUTH} endpoint status

保存数据库

Snapshot can only be requested from one etcd node, so --endpoints flag should contain only one endpoint.

1
2
3
4
ENDPOINTS=192.168.2.158:2379
etcdctl --endpoints=${ENDPOINTS} ${ETCD_AUTH} snapshot save my.db

Snapshot saved at my.db
1
2
3
4
5
6
7
etcdctl --write-out=table --endpoints=${ENDPOINTS} ${ETCD_AUTH} snapshot status my.db

+---------+----------+------------+------------+
| HASH | REVISION | TOTAL KEYS | TOTAL SIZE |
+---------+----------+------------+------------+
| c55e8b8 | 9 | 13 | 25 kB |
+---------+----------+------------+------------+

添加和删除节点

1
2
3
4
5
6
7
8
9
10
11
12
13
14
15
16
export ETCDCTL_API=3
ENDPOINTS=192.168.2.158:2379,192.168.2.159:2379,192.168.2.160:2379
# get member ID
etcdctl --endpoints=${ENDPOINTS} ${ETCD_AUTH} member list

# remove the member
MEMBER_ID=278c654c9a6dfd3b
etcdctl --endpoints=--endpoints=${ENDPOINTS} ${ETCD_AUTH} \
member remove ${MEMBER_ID}

# add a new member (node 4)
export ETCDCTL_API=3
# new member
etcdctl --endpoints=192.168.2.158:2379,192.168.2.159:2379 \
member add etcd-161 \
--peer-urls=http://192.168.2.161:2380

容错

对于 ETCD 集群,建议在集群中提供奇数个节点,下表显示了不同的节点数量时 ETCD 集群可以容忍的错误节点数量:

集群节点数 Majority 最大容错数
1 1 0
2 2 0
3 2 1
4 2 1
5 3 2
6 3 2
7 4 3
8 4 3
9 5 4

本文地址: https://github.com/maxzhao-it/blog/post/ebede6de/